IRAF is the Image Reduction and Analysis Facility, a general purpose software system for the reduction and analysis of astronomical data. IRAF is written and supported by the National Optical Astronomy Observatories (NOAO) in Tucson, Arizona. It has become the standard tool for astronomers. The Space Telescope Science Institute has adopted it for analyzing Hubble Space Telescope images. It is a very old package, but has been updated frequently. The most recent update is from this summer. IRAF shows its age—it isn't an elegant program, but it is very sophisticated.
We have to set up a few things before running IRAF for the first time. You will need to run the Terminal.app to get a Terminal window to enter the following Unix commands. (You may want to drag the icon for applications you use frequently like the Terminal.app, the Atom.app, or the TextWrangler.app to the Dock. See Mac Basics: The Dock for instructions.)
iraf directorycd to your new iraf directorymkiraf by typing the command in the Terminal windowxgterm. It will also create an IRAF login file called login.cl and a directory called uparm. This directory and file hold default settings for all IRAF programs. login.cl filelogin.cl was created by the mkiraf command with a few default parameters that need to be changed to customize IRAF for our use. Open login.cl in a text editor such as Atom and edit the following settings. There is a '#' in front of some of these lines. Remove the '#' to make IRAF execute the setting when you start IRAF.
set imtype = "fits" set stdimage = imt2048 set imdir = "." You have now set up your IRAF environment. You only have to complete these steps once.
When working on a project, it is usually best to create a directory in your iraf directory to keep all the files associated with that project. Create a directory called intro in your iraf directory to hold the files for this tutorial.
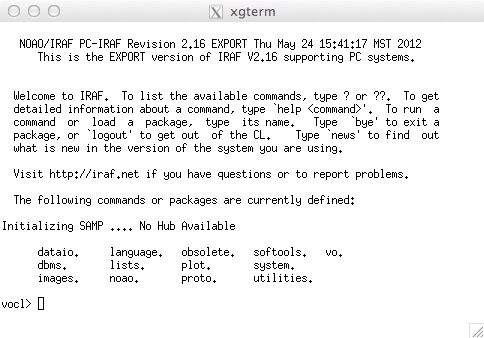
ds9 as a background task xgterm as a background taskxgterm is a special X11 terminal program that interfaces with IRAF so that IRAF can display graphics windows for plots. Set the -sb switch if you would like to create a terminal window with a scroll bar.cl in the xgterm windowYou should now have three windows. One Terminal window where you can enter UNIX commands, one SAOImage ds9 window for images, and one xgterm window for entering IRAF commands. After starting IRAF the xgterm window should look something like the one below.

Download the file PrettyPictures.zip. It contains the two image files (m46V.fits and m77_V.fits) in FITS format. FITS stands for 'Flexible Image Transport System' as is the most common file format for astronomical images. Download and unzip the files into your iraf directory.
The program for displaying images is called display. The syntax is
display filename frame_number
filename is the name of the image file you wish to display and frame_number is an integer that specifies which ds9 frame into which the image is displayed. For example, if you wanted to display the image file m77_V.fits in frame 1 you would type
vocl> display m77_V.fits 1
Display the two images you downloaded into frames 1 and 2. The contrast for the images my not be what you expected, but you can change that by using different scaling parameters when calling the display command. You can lear how to do that by accessing the help file for the display command.
To learn more about any command type help command_name. Bring up the help page for display. You'll see that display has lots of settable parameters. Only image and frame are required. Required parameters are shown under the USAGE heading.
In the middle of top of the help page for display you should see images.tv. This is IRAF's shorthand to tell you the display command is in the package tv which is contained in the package images. Packages have to be loaded before you can use the commands in them; images and tv are automatically loaded when you start IRAF. However, for many commands you will have to load the package before you can use them. To load a package, just type the package name at the IRAF prompt. Typing a '?' at the prompt will tell you which packages are loaded.
astutil package
The astutil package contains several useful astronomy utility programs. The precess command in astutil precesses coordinates. Load the astutil package, view the help page for precess then see if you can precess the coordinates α(J2000) = 3hr 45m 15s, δ(J2000) = 38° 40' 35" to todays date. Scan the help files for a few of the astutil programs and try a few.
Just type logout.